Importing Assessment Results
Importing Assessment Results
Ryskview can import results of ANY assessment. By utilizing the Ryskview Assessment Import Template (link below), you can cut and paste the results of any manual or automated assessment into the template for easy import.
Once the template is populated, log into Ryskview. On the menu bar, select “Nessus”, then select the smaller box in the top left labeled “Import Nessus Scan directly to POAM”. Select your file.
(If you get an error, see below for troubleshooting).
The screen will bring you to the Nessus Scan Import page.
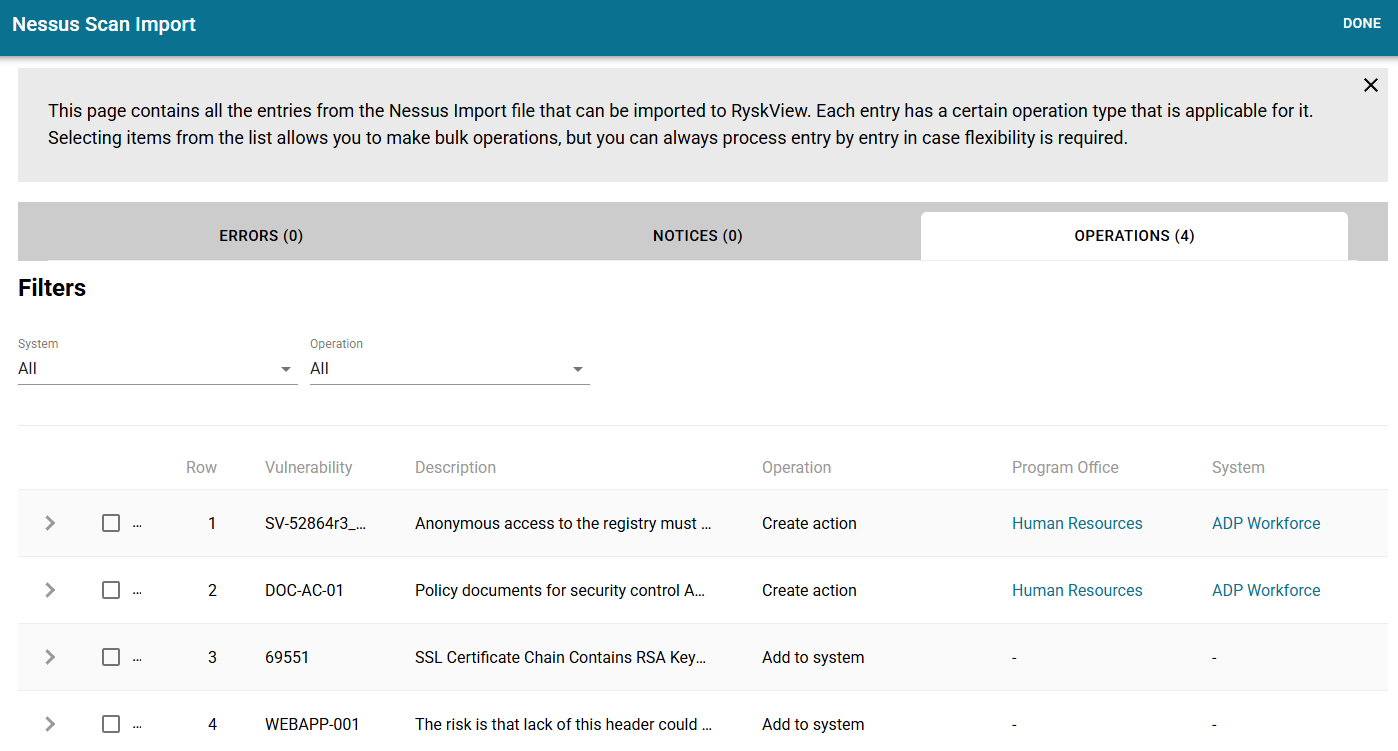
If Ryskview knows the Asset, then it will display in the operation column to “Create Action” and list the System and Program Office. If the Asset is unknown to Ryskview, then it will display “Add to System”.
In the “Operation” dropdown, select “Add to System”. The check then “Check All” box. Then click the “Add to System” button.
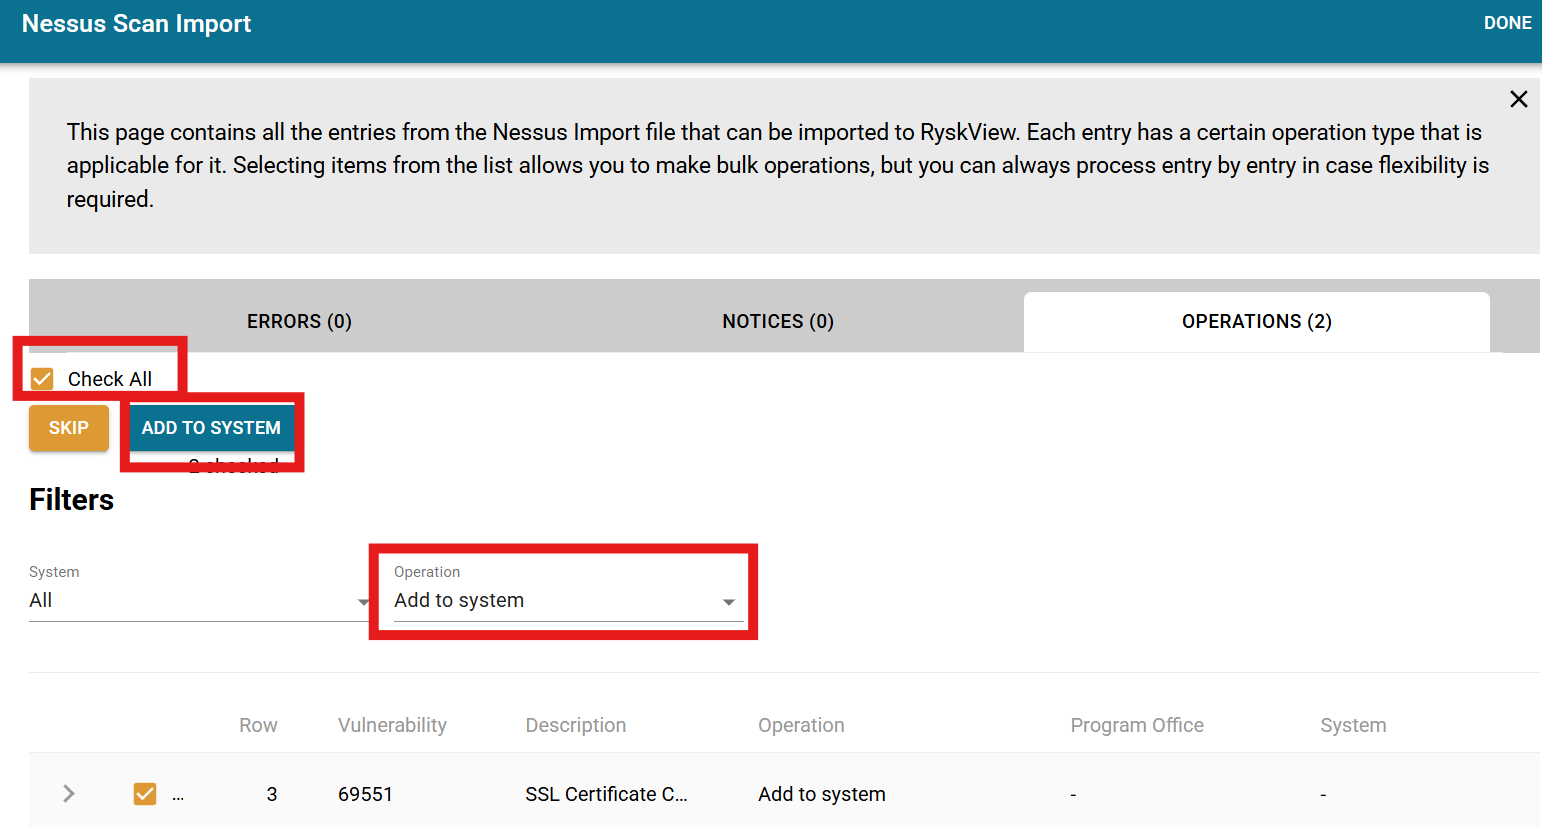
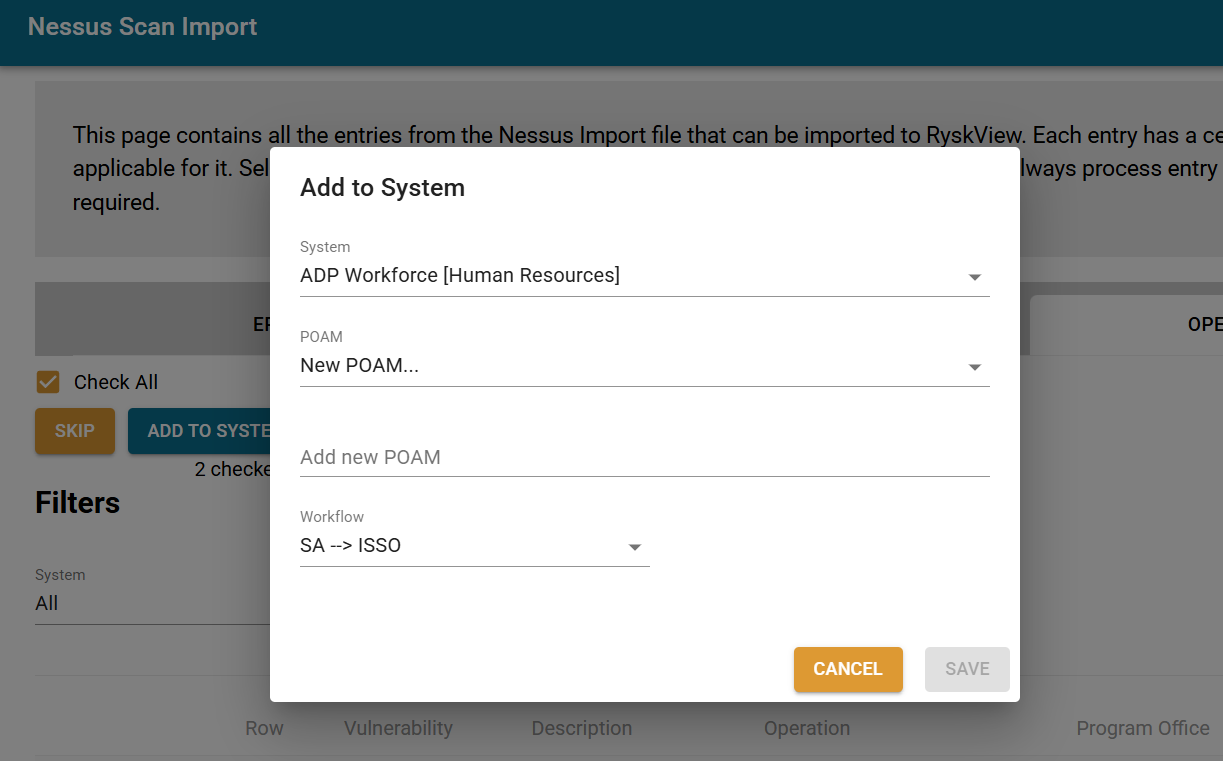
A modal will appear for selecting a System. Once the System is selected, the modal will allow you to add the open finding to an existing POAM or create a new one. Typically, you will create a new POAM, give it a name (usually descriptive of the assessment type/tool), and then select the workflow. The default workflow is “System Admin –> ISSO”, which would assign the finding to the System Admin, but you can choose a different workflow if appropriate.
This will create the Asset, link it to the System selected, and create an Action item on a POAM.
Once you have added all the unknown Assets to a POAM, it is time to add the known Assets. In the “Operations” dropdown, select “Create Action”. Select the “Check All” box, and then click “Create Action” button. Select the appropriate POAM (or create a one). If creating a new POAM, give it a name (usually descriptive of the assessment type/tool), and then select the workflow. The default workflow is “System Admin –> ISSO”, which would assign the finding to the System Admin, but you can choose a different workflow if appropriate.
This process of “Create Action” will add the assessment findings to the POAM that you selected.
Using the Import Template
Download the template linked at the top of this article. Please note that the file is a CSV format with specific column headers. Do not change the column headers.
There are four assessment findings populated as examples. Be sure to delete these rows before importing the file into Ryskview. Below is a description of each column field. Required fields are notated by and asterisk.
Plugin*
This is a unique identifier of the vulnerability, or finding. This can a standard UID such as a STIG ID or can be created by the user.
Plugin Name*
This is a name or title of the vulnerability.
Severity*
Severity can be Low, Medium, High, or Critical.
DNS Name*
This identifies the Asset that has the vulnerability. IT can be the DNS or hostname or any reference to the Asset.
IP Address
The IP address is not a required field, but it should be populated, when the IP is known. Do not include the subnet.
Protocol*
This is typically TCP, though can also be UDP, ICMP, or other appropriate protocols.
Port*
If the vulnerability has no port, or it is not applicable, just enter a zero.
MAC Address
This is optional, but helpful in documenting specific Assets.
Description*
This is an explanation of the vulnerability.
Plugin Output
This field is for entering any information specific to the assessment of the Asset. For example, it may be the file version of the non-patched software, the reason for the failed assessment, or evidence of the failed assessment result.
Solution
This is where fix information or guidance for remediation would be placed.
First Discovered*
This is the date and time the vulnerability was first found. It must be formatted correctly as seen below.
“Jan 21, 2025 12:46:12 EDT”
Last Observed
This is the most recent date the vulnerability was assessed. This will usually be the same as the First Discovered date. Last Observed cannot be earlier than First Discovered. It must be formatted correctly as seen below.
“Jan 21, 2025 12:46:12 EDT”
Once the Assessment results in the file are populated, save the file (as CSV) and then follow the procedures detailed above to import directly to a POAM.